BLOG – UNDER THE HOOD

April 1, 2021
How To Detail Your Car Like A Pro: The Ultimate Guide
Spring is just around the corner (it’s about time), and it’s almost time to detail your car to get rid of that winter grime. Even with consistent exterior washes, it’s full of mud, dirt and road salt.
The interior is starting to smell weird because of the wet floor mats that never have a chance to dry and there’s dirt and dust everywhere.
MOST of us do not like to stand in the driveway in subzero temperatures detailing our vehicle, so it gets pushed off all winter until it starts to warm up a little.
To maintain the “newness” of your car, we’d recommend doing a thorough detail of your car at least twice a year.
But how do the pro’s detail a car?
Considering the average detailing takes about six hours, depending on how dirty (or clean) it already is, there are many steps involved to do it properly.
Now that spring is heading our way, you’re looking for the best way to detail your car just like the professionals do. If you’re a DIYer, or have a strange love for cleaning your own car then this is the blog for you.
We’ve compiled a list of some helpful tips, tricks and detailing products to get that baby looking brand new again 😎.
Before you begin the detailing process, you’ll want to decide just how in depth you’re willing/wanting to go with this cleaning job.
In many cases, your car needs an extreme deep clean. Meaning, you need to pull out the seats themselves to really clean in all the hard to reach and usually missed areas. Nothing lasts longer than those old McD fries that have fallen between the seat and centre console 🤣.
If you’re thinking of getting this far into it, then start with a great tutorial on how to do so properly. While it seems a little crazy to pull the seats right out of the vehicle, it could in fact save you time (no seats to clean around) and you’ll ensure a deeper clean, including all those impossible places to reach.
If you have never cleaned between the front seats and the center console or under the back bench seats, then pulling them all out once a year might be a good idea.
Tools & Products To Grab Before You Start
Depending on the level of clean you want, some of these tools and products may or may not apply to you.
- A ratchet and socket (if you’re pulling out the seats)
- A screwdriver (again, only if you’re pulling the seats)
- A pry tool
- Detailing brushes
- A shop vacuum cleaner that is meant for wet and dry
- Microfibre cleaning cloths
- A garbage bag (or two)
- Carpet cleaner
- Steam cleaner
- Upholstery cleaner
- Interior detailer spray
- Glass cleaner
- Dawn Dish Soap (or automotive carpet cleaner)
- Salt stain remover
- Cleaning putty
- Paper towels
- Pressure washer
- Foam cannon (or bucket with grit guard insert)
- Bug removal spray
- Tar removal spray
- Wheel and tire cleaner
- Wheel cleaning brush (or toilet brush)
- A soft scrub brush or rags suitable for cleaning the exterior
- A good car wash soap
- Wax
- Painters tape
- Tire shine
- Vinyl & plastic renew
Once you have gathered all the necessary cleaning supplies and tools, you’re ready to start.
Step 1 – Disassembly & Removal
- Disconnect the battery: Start by disconnecting the negative terminal from your battery. This will allow you to remove the seats without accidentally discharging the airbags or possibly affecting any of the electronic components.
Pro-tip: Write down your radio presets in-case the memory is lost from the battery being disconnected.
- Take out all the garbage, personal belongings and the seats (if you’re taking that route).
- Pull all the floor mats out and set aside.
- Pull out the seats. Be sure to label any bolts you’ve removed if you take the seats out. Also be sure to label any disconnected wiring harnesses.
- Remove centre console and other in-the-way plastics: Look at your centre console and any other component that looks easily removable, use a pry-tool for greater access to cleaning hard to reach areas.

Step 2 – Vacuum
- Loosen Dirt & Grime: Use the soft bristled attachment when you detail your car and vacuum plastic surfaces to avoid scratching them but still hard enough to loosen dirt and grime.
- Use Detailing Brushes: You can also pick-up a set of detailing brushes to help clean out dust and grime out of the tough to reach places.
- Remove Trim & Attachments: Consider popping out cup holders, console and any other easily removable pop-clip attached components to clean tough to reach areas.
- Vacuum EVERYTHING: Use all the different attachments on your shop vac and clean every inch of carpet, every crack & crevice and all the cupholders, center console, door pockets etc.

Step 3 – Vents, Radio Buttons, Steering Wheel Controls
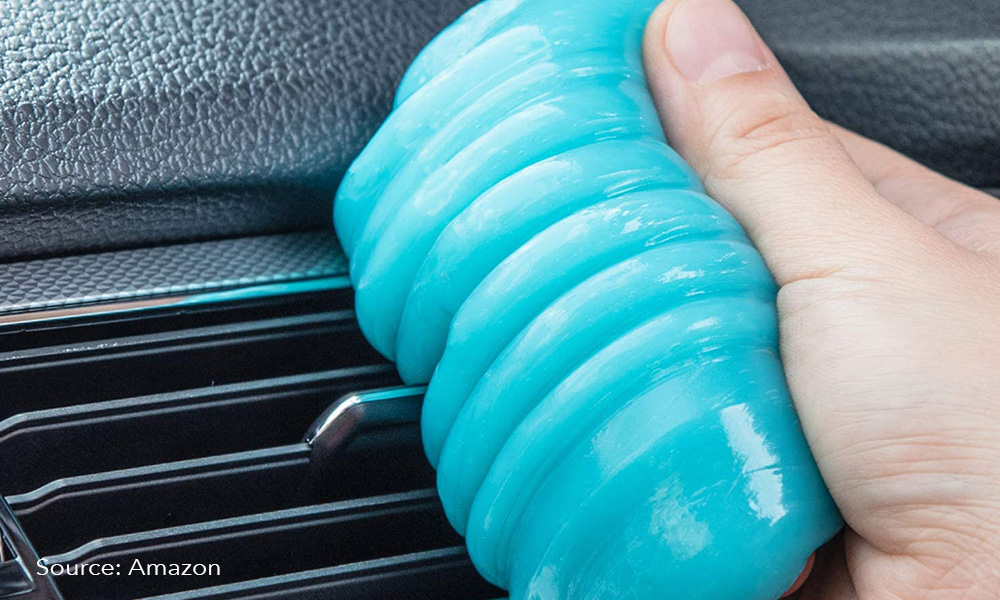
- Cleaning Putty: Grab yourself a good brand of cleaning putty and go to town. Cleaning putty is GREAT since it grabs all the dirt and grime stuck in those hard to reach places.
- Use the putty in all places that are hard to access or clean: Stick the putty in all the places you can’t just wipe out. Your door locks, air vents, cup holders, radio buttons, dashboard & centre console will look brand new again.
Step 4 – Upholstery
- Steam Clean: You can use an actual steam cleaner for carpets and upholstery along with a pretreatment.
- Use Upholstery Cleaner: You can use an automotive spray and scrub it with a scrub brush and then vacuum the surface again. The ArmorALL Oxi Magic spray does wonders on embedded dirt and stains.
- Clean Seats: If you remove the seats, clean them with the same process and leave them outdoors (or in the garage) to dry completely. Do your best to remove as much liquid as possible for a faster drying time.
- Interior Detailer Spray (The Secret Sauce): Use an interior detailer such as Chemical Guys Inner Clean to really bolster up a shine that even makes new cars jealous.
- Pro Tip: Apply the spray to your applicator / cleaning rag rather than spraying directly on the surface for a more even spread and you’ll also find you’ll use less chemical this way as well.
Step 5 – Windows
- Glass Cleaner: Grab the Windex or other glass cleaner and the paper towels. Clean all the inside of the windows & your mirrors. Try some GOO GONE on those stubborn sticky spots.
- Pro Tip: Substitute cleaning rags or cloths for newspaper instead. The paper / ink used in the newspaper for some reason works miracles and doesn’t leave any streaks.

Step 6 – Floor Mats
- Pressure Wash: With them outside of the vehicle on a flat surface, spray them down with a pressure washer.
- Apply soap: Use some good old Dawn Dish Soap, or automotive carpet cleaner and scrub like you’ve never scrubbed before. You’ll be amazed and a little disgusted at the amount of dirt that comes out of the mats in your car.
- Scrub HARD: Scrub them down for a solid 10 minutes and then pressure wash them until the water runs clear and soap free.
- Shop Vac Dry: Take your shop vac and suck out as much water as possible then hang your mats somewhere to dry.
- Finishing Vacuum & Fluff: If you want to fluff them up a little and have them looking even better, give them another quick vacuum once they are completely dry and run your hand across to fluff them up again.
- Still Have Salt Stains? Yep, there’s a cleaner for that. For those stubborn salt stains, consider using a salt stain remover.

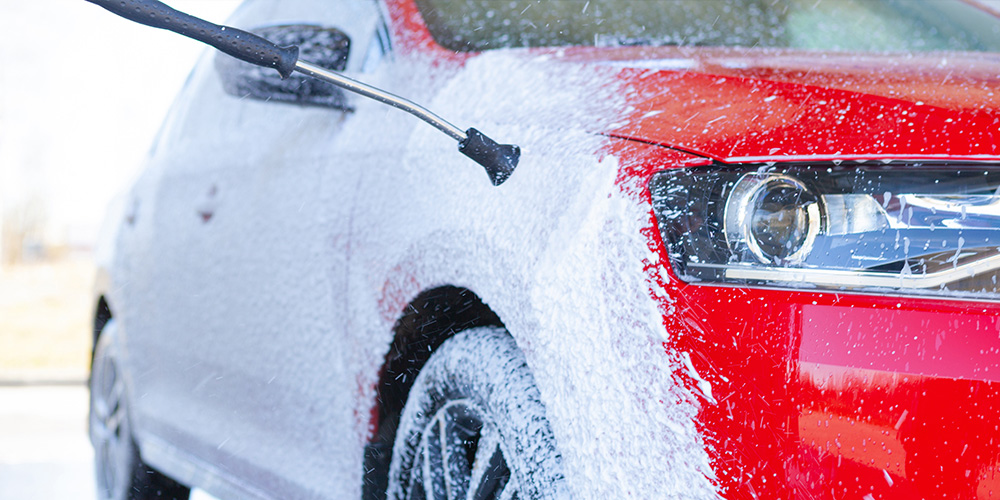
Step 7 – Pre-Wash & Pressure Washing Exterior
- Pressure Wash: Now that the interior is sparkling like your car just rolled out of the factory, it’s time to tackle the exterior. Time to wash your ride. Always try to use a pressure washer as a normal garden hose pressure is typically 40 PSI vs a pressure washer which we average at about 1500 PSI. Ensure to wash your car in the shade.
Pro Tip: Pressure washer should be between 1200-1900 PSI for safe automotive usage.
- Use the green or white tip: Ensure that you are using either the green tip (25 degree) or white tip (40 degree) for pressure washing your car. You want to ensure that you have enough of a fog pattern for great coverage without damaging your paint.
- Top-to-bottom and side-to-side sweeping motion: Always make sure to wash in a side to side sweeping motion and from top to bottom when cleaning so that the dirt and grime come off the vehicle rather than being pushed up.

Step 8: Apply Product & Clean Wheels
- Apply product: Now is also a great time to apply other products to pre-treat your vehicle such as Goo Gone bug removal spray, tar removal spray, etc…
- Clean your wheels: Using wheel and tire cleaner specific to your rims is quite important. Make sure you use a product that works well with your rims whether they are for steel, mags or alloy.
- Pro-tip: Don’t have a wheel cleaning brush? A toilet brush works well for this as well.

Step 9 – Apply Soap / Detergent
- Foam Cannon for Pressure Washer: For best results, try using a foam cannon and a powerful detergent. One of the top rated ones on most car forums is Honeydew Snow Foam from Chemical Guys.
- Foam is the best method to use when cleaning cars as it helps pull all the dirt and grime off and covers the most surface area. Using this method, you don’t end up wiping around dirt, sand and grime, which can cause swirls and scratches.
- Bucket Wash: No foam gun? That’s okay, you can use the good ol’ soap and bucket routine. Use a wash bucket that has a grit guard insert. Any bucket will work but just make sure you use a grit insert at a minimum.
- A grit guard insert is very important as when you wash your car, the grit can fall to the bottom without being trapped in the wash mitt/brush every time you dip it back into the bucket.
- The smallest piece of dirt or rock stuck in your scrub brush or microfibre cloth and you’ve got your car in the body shop fixing the bumper to bumper scratches. If you read this too late and already scratched up the exterior, don’t panic. Give CSN JD Collision a call.
Step 10 – Final Rinse, Wash & Dry
- Power wash side-to-side top-to-bottom: Give your car a good power-wash rinse. This should be in the side-to-side, top-to-bottom sweep. Clear off all the soap suds & foam.
- Pro Tip: If the weather is still dropping at night, be sure you dry inside the doors and handles really well so they don’t freeze shut.
- Wipe dry: Use your microfibre drying towels to clean, dry and polish your car fully dry. Preferably if you can do this in a dry, warm garage, this be the most ideal.

Step 11 – Wax & Detail
- The most commonly missed but most very important part of washing your car – waxing it back to that showroom shine.
- Depending on the colour of your car and application preference, there are different kinds of wax that you can use. There are waxes & detailers specific to black cars, there are pastes, liquids and detailers.
- For this, you’ll want to follow the instructions closely for the selected wax. Most waxes are a wipe on with applicator pad (some pastes and most liquids), let the film stay on for a few minutes and wipe off with a cleaning pad.
- NOTE: It’s EXTREMELY important that you DO NOT get any wax on your plastic surfaces. Our suggestion, use painters tape to stop you from getting any on your plastics as it will discolour your black plastics with white film that is nearly impossible to remove. If you’ve messed up this step, feel free to stop by and we can look at how to fix it.
- Once you’re happy with the cleaning job, it’s time to put everything back together… Bolt the seats back in if you took them out, put the dry floor mats back in and top it all off with a new car air freshener. Now you’re back in business!

Step 12: Final PRO Tip – Tire Shine, Vinyl & Plastic Renew. Bring Back That Showroom Finish!
- If you really want to bring back that new car look and feel, be sure to apply a product to your tires, vinyl and plastic that makes it look like new such as Chemical Guys Extreme VRP. This will restore the shine and finishes, without the greasy feeling.
Trust us on this, you won’t regret it.

Conclusion
There is no doubt about it, detailing your car is a BIG job and requires a day’s commitment but it’s well worth it. Whether you’re a gearhead or a hockey mom, there is nothing more satisfying than having a seriously clean ride.
Not only will you keep your car looking great for much longer but you prevent set-in stains and damage that will lower the value of your vehicle.
Did you know, when you bring in your vehicle for body repairs at CSN JD Collision, we give your ride a little TLC before we give it back?
Yep, a nice full wash on the outside and a quick detailing on the inside.
We know how important it is to detail your car throughout the year and keep that ride lookin’ new.
